
Although POS is using D365 and the Lasernet Suite, it is slightly different from traditional Lasernet installations. Here are a few of the differences:
- POS does not use Azure Service bus or queues.
- POS requires that the central POS server has network connectivity to each of the POS for updates.
- POS requires a separate license key (server service license key only as it shares the developer key with Lasernet on the central server).
- Make sure that the Lasernet version for the Central POS and each POS is the same.
- You need a running mPOS configuration in D365 before you can print.
Lasernet Installation - POS Hardware
- Connect to the POS
- Install the version of Lasernet you want to use for the POS Hardware
- On the POS Lasernet server, you need to add the POS Lasernet server in the Lasernet Admin Portal. (http://localhost:3479/)
- Add a new Instance in the License Manager and name it appropriately. You can pick the next port number available (if needed)
- Add the POS Server license to the new Instance (Server Service only)
Lasernet Installation - Central Server
- Connect to the Lasernet server
- Copy the POS configuration to the VM
- On the central Lasernet server, you need to add each POS Lasernet server (except for the central Lasernet server) in the Lasernet Configuration server. http://localhost:3479/
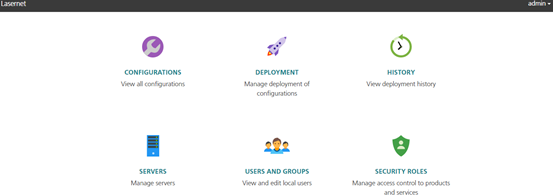
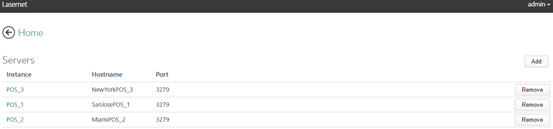
- Add a new instance in the License Manager and name it appropriately. You can pick the next port number available (i.e., 3280, 3281, etc.)
- Add the POS Server license to the new Instance.
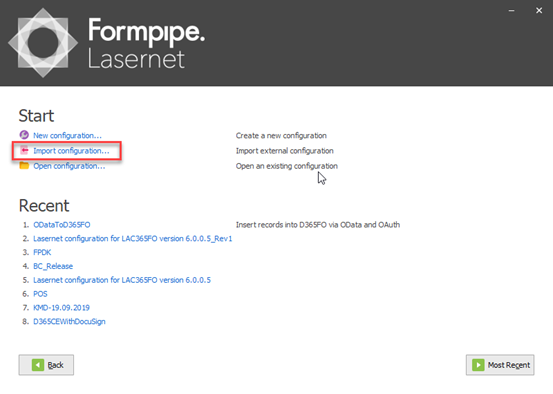
- On the central Lasernet server, import the MPOS configuration into the Lasernet Developer.
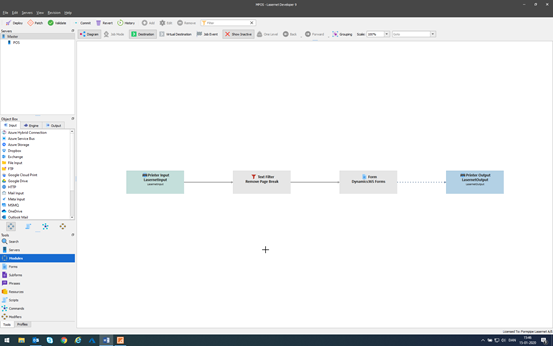
- Select Servers from the left menu and remove the old server.
- Add a new server.
- Select the instance(s) from the Instance drop-down list.
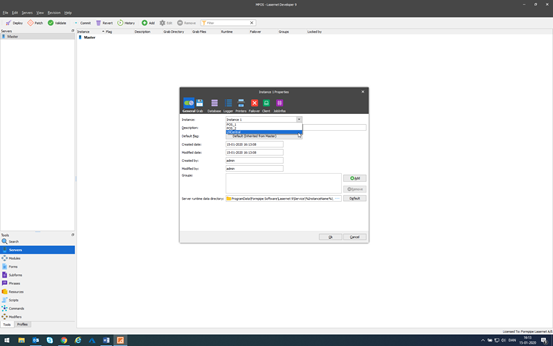
- If you do not see your instance in the dropdown list, restart the developer and try again.
- Select the Grab tab and then enable Grab Mode.
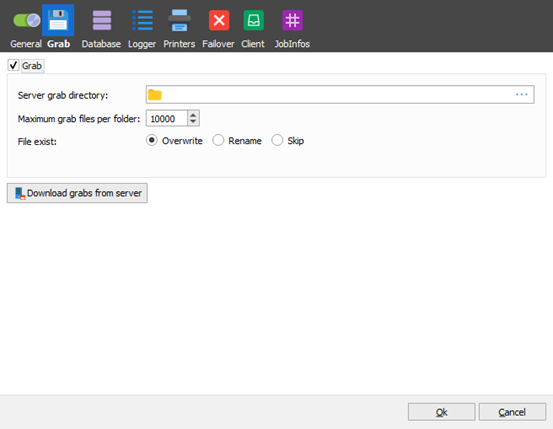
- Select Ok to close the window.
- Add a new server for each POS Lasernet server, and remember to enable Grab mode.

- From the top menu, select Commit and then Deploy - select the POS you want to push the configuration to.
Add Input Printer
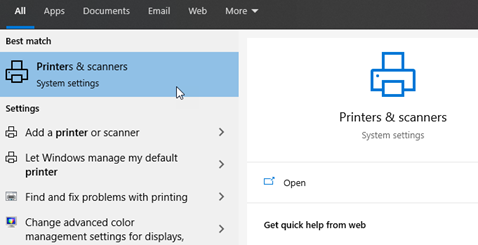
- Log into the POS Hardware where Lasernet is installed. Go to Printers and scanners.
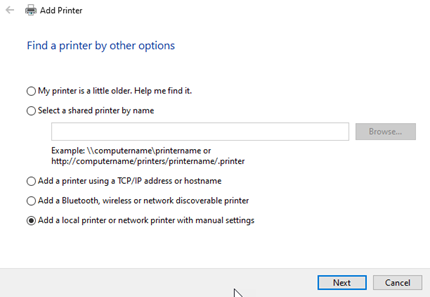
- Add a new printer. The first select Add a Local printer or network printer with manual settings and then select Next.
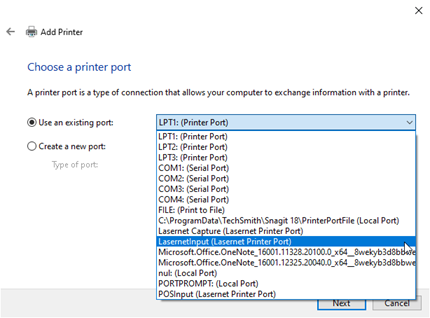
- From the Use, an existing port drop-down list, choose the LasernetInput port and select Next.
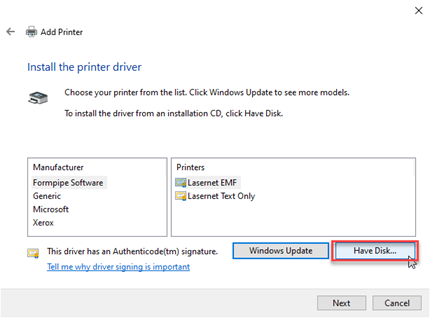
- Select Have Disk and then Browse.
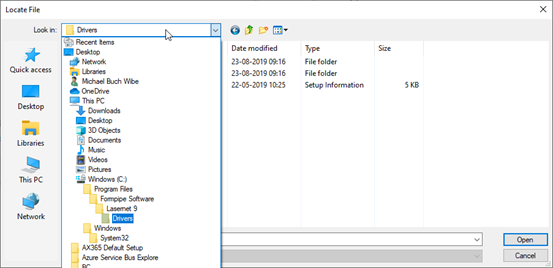
- Browse into C:\Program Files\Formpipe Software\Lasernet 9\Drivers
- Select LnPrintComponents.inf and then Open.
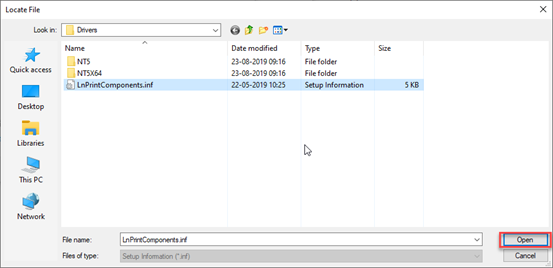
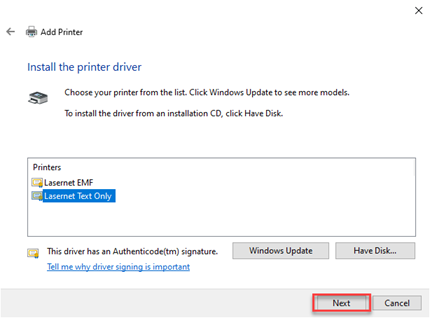
- Select Ok to close the form and then select Lasernet Text Only in the screen and then select Next.
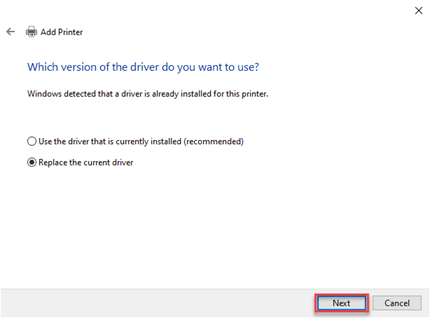
- Select Replace the current driver and then Next.
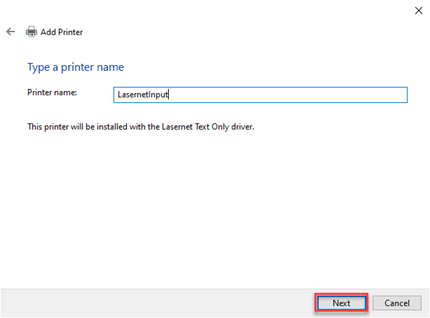
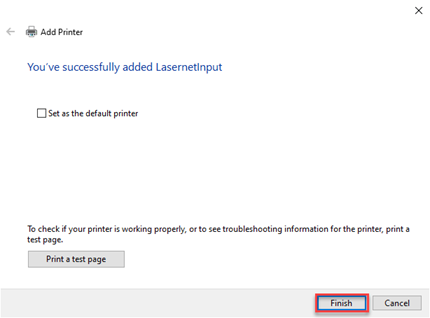
- Type in LasernetInput in the Printer name field and then select Next.
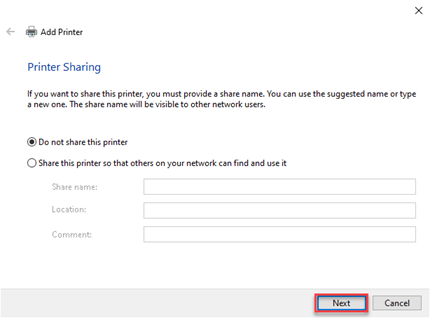
- Select Do not share this printer and then Next.
- Select Finish, and your input printer to Lasernet is now ready.
Configure the columns and rows for the LasernetInput to be 250 (columns) and 120 (rows).
***This is done via Printers and Scanners – Click on LasernetInput – Open Queue – Printer – Properties – Device Settings***
Add Output printer
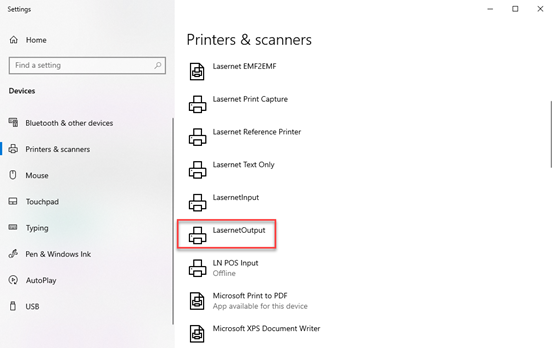
Now on the same server, you need to add another printer that can print your receipts. It does not matter what driver you use here, so please use the drivers that come with the printer. But one important thing is the name of the printer, and that must be LasernetOutput like your settings in the Lasernet Configuration.
***Please note that the printers do not need to be shared***
D365 - Retail Hardware Profile
- Log into your D365FO environment and search for Hardware Profiles (under the Retail menu)
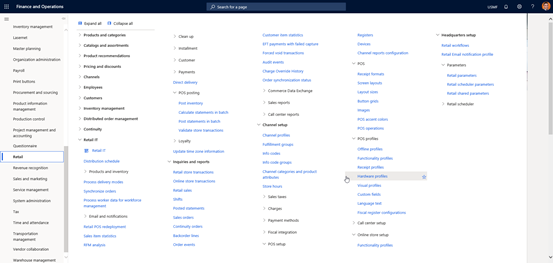
- Locate or add a new profile that you will use for Lasernet.
- Please change the settings, so it matches the settings in the picture below.
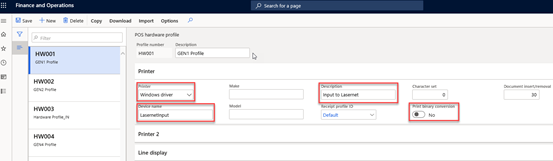
- Save and close the form.
- Run the 1090 (Registers) batch job to update the Hardware Profile in mPOS (can be found in Distribution Schedule).
Now log into your POS terminal and print the receipt that you would like Lasernet to do the design. Make sure that you select the LasernetInput printer.
If you have more than one printer, make sure to add the above under Printer 2 in the D365 configuration.